The Ratio
After my articles about Attack and Release, I started thinking maybe I should hit on a compressor’s Ratio control a bit. I hadn’t originally planned on digging in on this because, in truth, it’s probably only within the last 9 months or so that I really started playing with different Ratio’s again. Most of the compressors I reach for these days have a fixed Ratio setting I often can’t even see so I don’t think about it which is partially why I haven’t thought about Ratio that much.
Then on compressors where the Ratio is selectable, I would typically use a lower setting 90% of the time. For example, on an 1176 style compressor, 9 out of 10 times I set it at 4:1. Since that always seemed to work so well for me, over the years I started defaulting other compressors I used to 4:1 ratios when I’d start mixing. Again, those also seemed to work pretty well in most situations I was in at the time so I just didn’t think about touching the Ratio control because when something’s working you don’t touch it. “Do No Harm” is an overriding philosophy for me when I’m working, so if something is working I don’t touch it. However, lately I’ve been playing with Ratio’s more often. Why is that? Well, let’s find out.
Ratio, in some ways, is kind of a big deal for a compressor because Ratio controls how much compression is going to happen by controlling how much attenuation happens. This idea of how much can get a little confusing because in one sense the Threshold control may also seem like a how much control because a higher Threshold setting isn’t going to be attenuated as much as a lower Threshold.
The reality, though, is all of the controls on our compressor work together and contribute to the amount of gain reduction we see on the meter. I can create a similar meter reading by manipulating any of the controls because all of the controls will influence how much the compressor works. And that’s the problem: gain reduction does not equate to the amount of compression we’re doing–I wrote about this earlier this year.
At the end of the day, though, Ratio is the true how much control. Let’s look at why that is, and let me apologize up front because there might be math involved.
Let’s consider some different Ratio settings working on a signal. With each Ratio setting, we’ll set our compressor to achieve 6 dB of gain reduction. So now the question is, “Is that 6 dB of gain reduction really the same amount of compression?” To answer that question, let’s think about how Ratio affects gain reduction in the first place.
Ratio, in technical terms, is how much signal level we put in to the compressor relative to how much signal we get out. With a 2:1 ratio, we put 2 dB of signal level above our Threshold in for every 1 dB of signal level we actually get out above the Threshold. With a 4:1 ratio, we put in 4 dB of level for every 1 dB we get out. In a way, the Ratio control is like a flow control for our signal. With a lower Ratio, more signal will pass through without getting attenuated. With a higher Ratio, less signal is allowed to pass through. Knowing this, let’s go back to our 6 dB example.
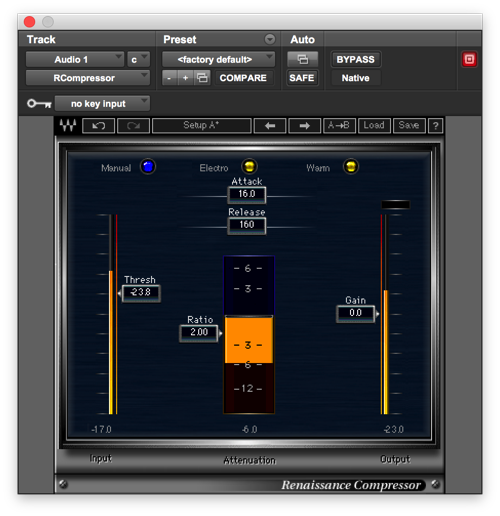
Here we have the same compressor with 3 different Ratio settings: 2:1, 4:1, and 8:1. Each compressor is providing the same amount of gain reduction.


In these examples, there are only two things that changed: the Ratio setting and the amount of signal fed into the compressor. Notice that it took MORE signal at a lower Ratio to achieve the same amount of gain reduction; you can see these levels on the bottom left of the compressor, and bear in mind that these are negative numbers because 0 dBFS is the top of the scale. On the flip side, you can also see here that our output level goes up as the Ratio gets lower.
Now let’s look at this from another angle. We’ll do 6 dB of gain reduction at those same three ratios, but this time the input level will stay the same so the Threshold will be adjusted for the same amount of Gain Reduction.


Are you confused, yet, as to what’s happening here and what all this means?
In the first examples where the signal level changes, we can see how the Ratio controls how much compression is happening. When the same amount of gain reduction happens with less signal, that means more compression is actually happening because the compressor is clamping down harder sooner. In the second set of examples, the Threshold changes show how Threshold controls where in our signal level gain reduction begins since we have to move the Threshold.
Still confused? Let’s stop gritting our teeth and get practical.
Personally, I think of Threshold as the where control as in where is the signal level going to be when gain reduction starts happening. Ratio tells the compressor how the signal will behave or be controlled beyond that threshold.
So let’s say we have a wildly dynamic vocalist; I find these tend to be quite common when working with volunteers and non-professional singers who haven’t quite mastered control, yet. If we sit our vocalist where he probably should sit in the mix, we’ll likely hear some of what he’s singing and lose some of what he’s singing amongst the instrumentation as his volume drops. The inexperienced way of dealing with these vocalists is to just push them up over the top of every instrument. The problem with this, though, is the vocal typically sounds disconnected from the instrumentation because the dynamics of the two performances are too far apart. I call this the “karaoke vocal” effect.
So instead we employ our friend the compressor with a decent amount of gain reduction happening, let’s say, in the neighborhood of 6 dB. Why 6 dB? Well, when I’m using a compressor in a live situation, I am keenly aware of potential gain before feedback issues. If I do any gain reduction on an input, I’m likely going to need to get it back somehow and I’d like to think that in most situations I can get away with at least 6 dB of gain.
So our compressor is working away doing 6 dB of gain reduction, but our vocal still isn’t sitting right. Why is that? Because our Ratio may not be set right. Ratio controls how close the performance will stay to its original dynamic. If we set our Ratio higher, we reduce the original dynamic and get more control. If we lower the Ratio, we let more of that original dynamic pass through. Ratio lets us control how extreme or relaxed we want to get with our compressor.
Now, where things get tricky is our Ratio and Threshold controls interact quite a bit. I probably shouldn’t have even thrown out that 6 dB reduction number because achieving a specific amount of gain reduction requires placing the Threshold in a specific spot which will be a moving target depending on how the Ratio is set. The ideal spot for controlling something may not be in the place where we can achieve a specific amount of gain reduction.
So don’t get hung up on numbers and readings. You have to use your ears and figure out what feels right. Ask yourself if you’re hearing all the details in the playing you want to hear. Does it sound natural or artificial when you turn on the compressor?
Here’s one last thing that might help in thinking about Ratio. Many digital compressors these days have a nice little display of the compressor’s ratio depicted as a level graph. For example, here’s the display on the Waves eMo D5 plug-in. The horizontal axis is typically the level coming in while the vertical axis is how much goes out.


In this second photo our Ratio is now set at 4:1. Notice how the slope is starting to slant upwards. In this case we have raised the ceiling for our signal. This means that our compressor is still going to hold the signal close to the Threshold, but not quite as much.
The point of all this is, when we want to hold a sound around a particular level, our Ratio sets how much control we put on it and how close we hold it to that level. One of the ways I remember this is the more even or Level I want something to sound, the closer I need to approach Limiting the signal.
One last thing I’ll leave you with is a potential downside of too high of a Ratio. While raising the Ratio will provide us with more control on a signal, it may also reduce the perceived size of something. Keep this in mind as you start increasing your control on your dynamic vocalists.
That’s all I have for now. I hope this helps, and I haven’t overly confused you more on this topic. I’d love to know if this makes sense, and if there other compression related things you’d like me to write about. Please let me know in the comments.
 Previous Post
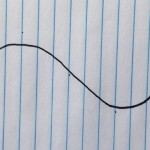 Next Post


