Pants Flapping? – Part 3
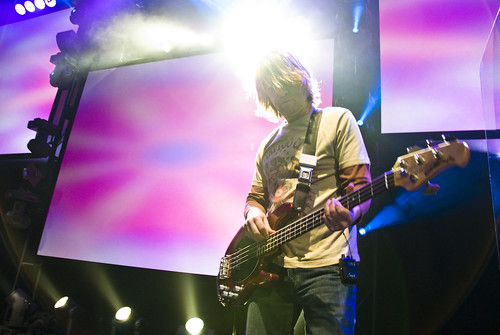
Photo by Stephen Hunton
So I’m over subs. You can read the last two posts to get some insight on that, but as we last left off I was talking about the need to minimize frequency overlap on the stuff we put in our subs. Today I’m going to look at some of the strategies I’m currently using to do this and tighten up the low end in my mixes.
Now we can debate on what instruments should be in the subs, but ultimately in contemporary music I think we’re really talking about the kick drum and bass guitar. Some folks look at these two instruments as One instrument, but I go back and forth on that idea maybe because I’ve mixed a lot of guys over the years who were playing in different worlds. However, I do believe there is definitely a symbiotic relationship between the kick and bass. While getting that relationship properly balanced largely depends on whether the musicians are playing together, we still need to make room for both of these instruments if we’re going to put them in our subs.
So here’s the thing: in most pop/rock ‘n roll type music, the kick drum traditionally occupies the lowest portions of our frequency spectrum meaning the lowest frequencies in the mix are created by the kick drum. Our modern-contemporary-relevant-current worship stuff played by bands in churches generally falls right into this, but this isn’t a new, hip, latest-thing concept. Whether you’re doing Sandi Patty’s greatest hits or the latest thing from Hillsong United, this probably applies to the style of music you’re doing if you have drums in your music because it is quite common in MOST styles of music.
As it turns out, the kick drum owning the lowest frequencies in our mix is actually a good thing for live sound. Keep in mind these frequencies are also probably going to be the loosest, roll around the room frequencies in our venue. So let’s say our subs crossover to our mains around 80-100 Hz. The fundamental of most kick drums is probably somewhere in the 50-80 Hz range depending on the drum and how it’s tuned. Now, if our kick is the lowest thing in the mix and we want to have a minimum of frequency overlap between our instruments in that octave–remember, we’re talking 40-80 Hz–how much bass guitar do you think should really end up in the subs? Do you see where I’m going with this?
Now before I go further, let me make a quick disclaimer that this is not a prescription for every mix situation. There are times when putting the bass guitar below the kick can be nice. For example, I’ll never forget on U2’s Elevation tour when they played the bridge to Elevation, Joe O added some subharmonics on Adam’s bass that created a really cool effect, and you felt the bass. Scovill played a bit with this on the 2010 Petty tour as well. Some kick drums might also be tuned too high, and making them the lowest part of the mix could restrict our bass guitar too much.
However, in most situations for most modern church band music we just don’t need bass guitar down there as much as we might think. The real meat of the bass is usually 80 Hz and above, believe it or not, and the good stuff that can help dig the note out are the harmonics landing in the 300-1000 Hz range or higher depending on the bass. But don’t read this wrong. I’m not advocating completely removing the bass guitar from the subs. The bass guitar DOES play notes that reside in the sub region. What I’m simply suggesting is that the bass guitar doesn’t need and probably shouldn’t be the prominent instrument at 40 Hz. So how do you find space for the kick and the bass in the subs or even the overall mix for that matter?
Let me start by addressing the overall concept of making space because this is one of those concepts that I think a lot of folks struggle to understand and implement. I’m actually working on a little ebook that gets into practical steps to learn how to do this. It was going to be a blog post, but it started getting WAY too long….go figure…. Hopefully it will be done by the end of the year if I ever finish it, but I digress.
Making space is not about absolutely restricting instruments to or from specific frequency bands. In the last post I mentioned that when we have instruments in the same frequency space, the loudest one generally wins. Making space is really more about rigging the game so that a specific instrument can win in a certain area of the spectrum.
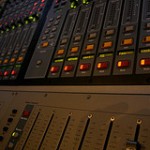
In the case of our kick and bass, it’s usually easiest to first figure out where the kick drum fundamental is since that’s going to be the bottom boundary of the mix. There are a couple ways to go about doing this. You can try boosting a little on your low EQ and sweep a bit until the drum jumps out at you a bit, or you can also use my preferred way of cheating using a spectrograph like the one in Smaart: Push up the kick into the PA and look for the hot spot in the sub-band on the spectrograph. Once you know where your kick fundamental is, you have a rough idea on the lower limit of your bass guitar.
Now it’s time to check the bass to make sure it’s not stepping on the kick. Some basses and/or bassists won’t fight the kick, but if Mr. Bass is trying to pick a fight then EQ is going to be our friend. You can start using a simple parametric EQ or sweepable shelf on the bass channel. Try tuning it to the kick’s fundamental and attenuating. You might even want to dial the EQ frequency a hair higher than the kick. Alternately you can also use a sweepable high-pass filter. Take the frequency as low as you can without affecting the sub-low sound/punch of your kick. Again, you can start just above the kick fundamental and adjust to taste. If you do try a high-pass, remember that it isn’t a brick wall filter; you will still have sound below the setting of the high-pass in the mix, but they will be attenuated which isn’t necessarily a bad thing in this case. Some consoles’ high pass filters are equipped with an adjustable slope, and a gentler slope might work better in this application. If the feature is available it is probably worth experimenting to find the best fit.
Now as you tweak, you should be listening for the two instruments to become distinct in that sub-low region. Your kick drum’s thump should tighten up and get cleaner as a result, but you’ll still want to be careful not to take out more low end from your bass than necessary. The bass still needs to sound like a bass and for that you’ll need to retain it in the subs. The bass can play notes down there so make sure you’re not losing any music.
Once you’ve done this, you might also need to make some room for your bass guitar in the 100-200 Hz range if your kick is filling up that space. We want that sub thump for our kick, but we still need space for the bass to play a range of notes above it so take your kick drum EQ and knock out some room in the 100-200 Hz range if you need to. This will probably also help tighten up the kick some more along with the low end in general.
My personal workflow on the kick and bass generally looks something like this. I like to start by getting the kick roughed in and sounding good without spending too much time on it. I hate spending a lot of time on the kick drum, but I usually want to do something to it to give it clarity and to clean it up a bit. Typically through this process, I will naturally make some room for the meat of the bass guitar in the region above it because that 100-200 Hz space can make the kick sound muddy on its own. Next I’ll bring in the bass and start working on the two instruments together to minimize frequency overlap as well as mix balance. When the kick and bass play together, it’s almost like I want the kick drum to add weight and attack/snap to the bass guitar. Too much kick will separate it from the bass, but too much bass leaves the kick feeling wimpy. Once the balance between the kick and bass is right, I’ll get the rest of the kit balanced with the kick/bass. From that point on, I try as hard as I can to maintain drums and bass as one.
Lately something I’ve liked is placing my bass channel right next to the kick drum on the console. It’s amazing what a simple move like that can do to help your mind wrap around the idea of the two instruments being one. And once you do get these two instruments into their own space, it can be a lot easier to understand how they can really work together to create an impactful and tight low end in the mix. I also like having the faders right next to each other because getting the balance finely tuned can really make a difference here. Depending on the players, that balance might need adjusting throughout the course of a set or even a song and having everything together on the console just makes it easier for me to finesse it quickly.
Let me end this series with this. While important, these ideas are not a magic-bullet. PA design and optimization is still fundamental in getting the sub-lows right. If the PA’s not right all attempts made on the console will most likely be futile. In addition, the proper use of compression can also have an impact on tightening up the low end. However, I believe the ideas listed above can go a long way towards tightening up the low end of a mix and making appropriate use of the subs. When properly applied, I also believe they can have the largest impact on the sub-lows of the mix, and the beauty is that you probably won’t need any special, additional gear to make it happen.
If you have some great tricks for getting the low end in your own mixes tighter, please feel free to share them in the comments!
 Next Post


My usual procedure for giving these two instruments their own space…
Boost the kick fundamental *and* its octave. Then boost the bass right in between.
ie: boost kick at 50hz and 100hz; boost bass at 75hz.