When It’s Not So Simple – Part 4

I’m wrapping up this series looking at where my signal chains can be a little more complicated than usual. This time I’ll be looking at my Master Buss. The Master Buss is important to me for a couple of reasons. For starters, it’s the one place I can apply global processing to everything, but maybe most importantly it’s the last chance I have to do anything before my mix hits the PA. So, in my mind, processing on the master buss probably isn’t for the uninitiated as anything other than a gentle touch can often lead to trouble. I also tend to find that moves made on the master tend to be magnified compared to the same moves being made on an input. For example, a 1-2 dB cut with an EQ can feel much more drastic than making a 1-2 dB cut on an input.
Master buss processing isn’t something I always do. It really depends on the console and situation I’m in. There are parts of it I like to do every time I’m mixing, however, it’s really case by case depending on the gear I’m in as well as the music I’m mixing.
So let’s dive in.
Console Processing
Let me say up front that I generally avoid using console processing on the master bus. I find that the resolution of console processing in a lot of digital desks, and especially the lower and mi-level desks is simply to coarse. For example, the EQ’s on Yamaha M7’s, CL’s, and below won’t do less than .5 dB steps, and that can be too much for what I will do on a master. This limitation already frustrates me on the inputs, but I can deal with it there. On a master buss, however, that same move is perceptually magnified and can be too much.
That said, if all I have is console processing and I absolutely have to do some processing, I will use the on-board processing.
1. Compression (rarely)
This is a big maybe here. On some occasions I might try the console’s compressor on the master, but it’s really really rare. I’ll talk a bit more about compression on the master in the outboard section.
2. EQ (last resort)
This is another maybe, but I’ll use EQ here as a last resort.
Outboard/Plug-In Processing
Most of what I do on a master buss happens with outboard.
1. Saturation
A missing component in digital consoles is “color” on the summing buss so I will often employ some sort of console style saturation first. The Waves NLS Buss plug-in is my typical choice for this. I usually have this on the Nevo setting with a little bit of drive going. Sometimes I like the Spike setting, but I’ve had it distort in ways I’m not a big fan of so I usually go with the Nevo.
2. Buss Compression
I’ve written about buss compression in the past, but I’ll just say that I’m typically a fan in most of the mixing situations I’m in these days. Most of my clients hire me because they want things refined to a certain extent, and buss compression is one of the ways I do this as a little bit of buss compression tends to glue things together. If someone wants things more raw, I’ll usually try turning this off.
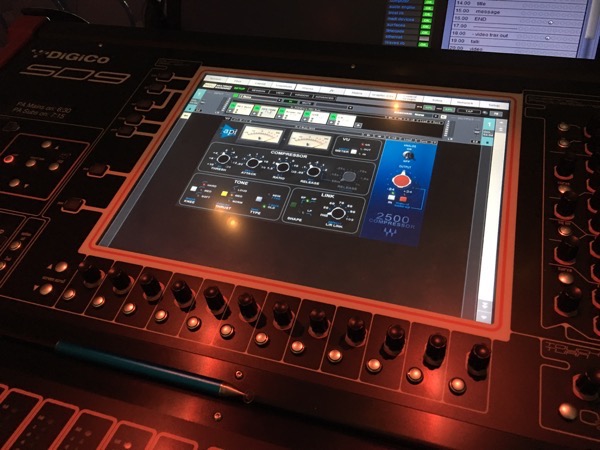
98% of the time I’m using the Waves API 2500 for this. I know some folks who like the SSL Buss compressor, but I prefer the API because I feel like it’s a little more aggressive which can add some urgency to things. On a big chorus I tickle the needle in the 1-2 dB’ish range of gain reduction. So I’m just kissing it a little. This is another one of those places where things are amplified so it doesn’t take much for me to get what I want out of this.
Another plug-in I sometimes experiment with is the CLA MixDown plug-in. This is a great choice if you’ve never used buss compression before because it takes a lot of the guesswork out of the settings. I like to tweak, though, or at least know I can tweak if I want to.
3. Tape Saturation
If I’m running short on DSP, this is probably the first thing that goes, however, when I can I usually like to add a little more saturation at this point in the form of a tape style saturation. My go-to here is usually the Kramer Master Tape plug-in. I’ll usually set the inputs so I’m hitting around 0 dB VU in the loudest section. Then I’ll play with the Flux control to add more or less of the color. When this is right it adds a bit of glue and color to the mix, and it also can help tighten up the bottom end.
One thing I’ll mention about this particular plug-in is it can be subtle until you go too far. Since this is a master tape emulation, I don’t find it takes level the same way I might want to hit a multitrack tape machine where pushing into the red can create a desirable effect. I’m pretty conservative in using this as a result because I don’t want to have to dig to find this later on if I’m hearing distortion.
4. EQ
I hate EQ’ing my master buss. I know some engineers have it as a regular part of their workflow, but whenever I do it I always feel like it’s something I should have hit on the inputs. That said, I still like having an EQ on my master especially when I’m in a new room on a new system for the first time. I use this for emergencies and as a last resort. If a new PA I’m on needs a bit of love, I’ll often do it with this as well because in a lot of installs it’s quicker and easier to EQ here than to try and get into the system DSP.
5. Multiband / Dynamic EQ
My last processor is some form of dynamic equalization. I really just use this to manage any hurt when things get loud. Again, this is something I try and avoid as I prefer to get things on the input side, but it’s fairly common that I’ll have this running.
For years I used the C4 for this. I know some guys like having a C6 here, but I never used the floating bands on my master so I’ve stuck with C4 for a long time. I will probably transition this to the F6 at some point, but I’ve been rethinking that a bit simply because I’ve used C4 in this capacity for so long I’m not sure I need to reinvent the wheel on this just, yet.
I think that’s it for my more complicated signal chains. So what inputs do you find yourself using complex signal chains on? Let me know in the comments.
 Previous Post