Year of the System 2010 Home Movies: Putting It All Together

Amp Room v1.4
One of my favorite things about our system refit(s) relates to our infrastructure. It’s not nearly as glamourous as a touring grade PA, but it is one of the most critical elements to what we do week in and week out. When the infrastructure is setup right, it means our staff and volunteers don’t have to think so hard to make Sunday happen.
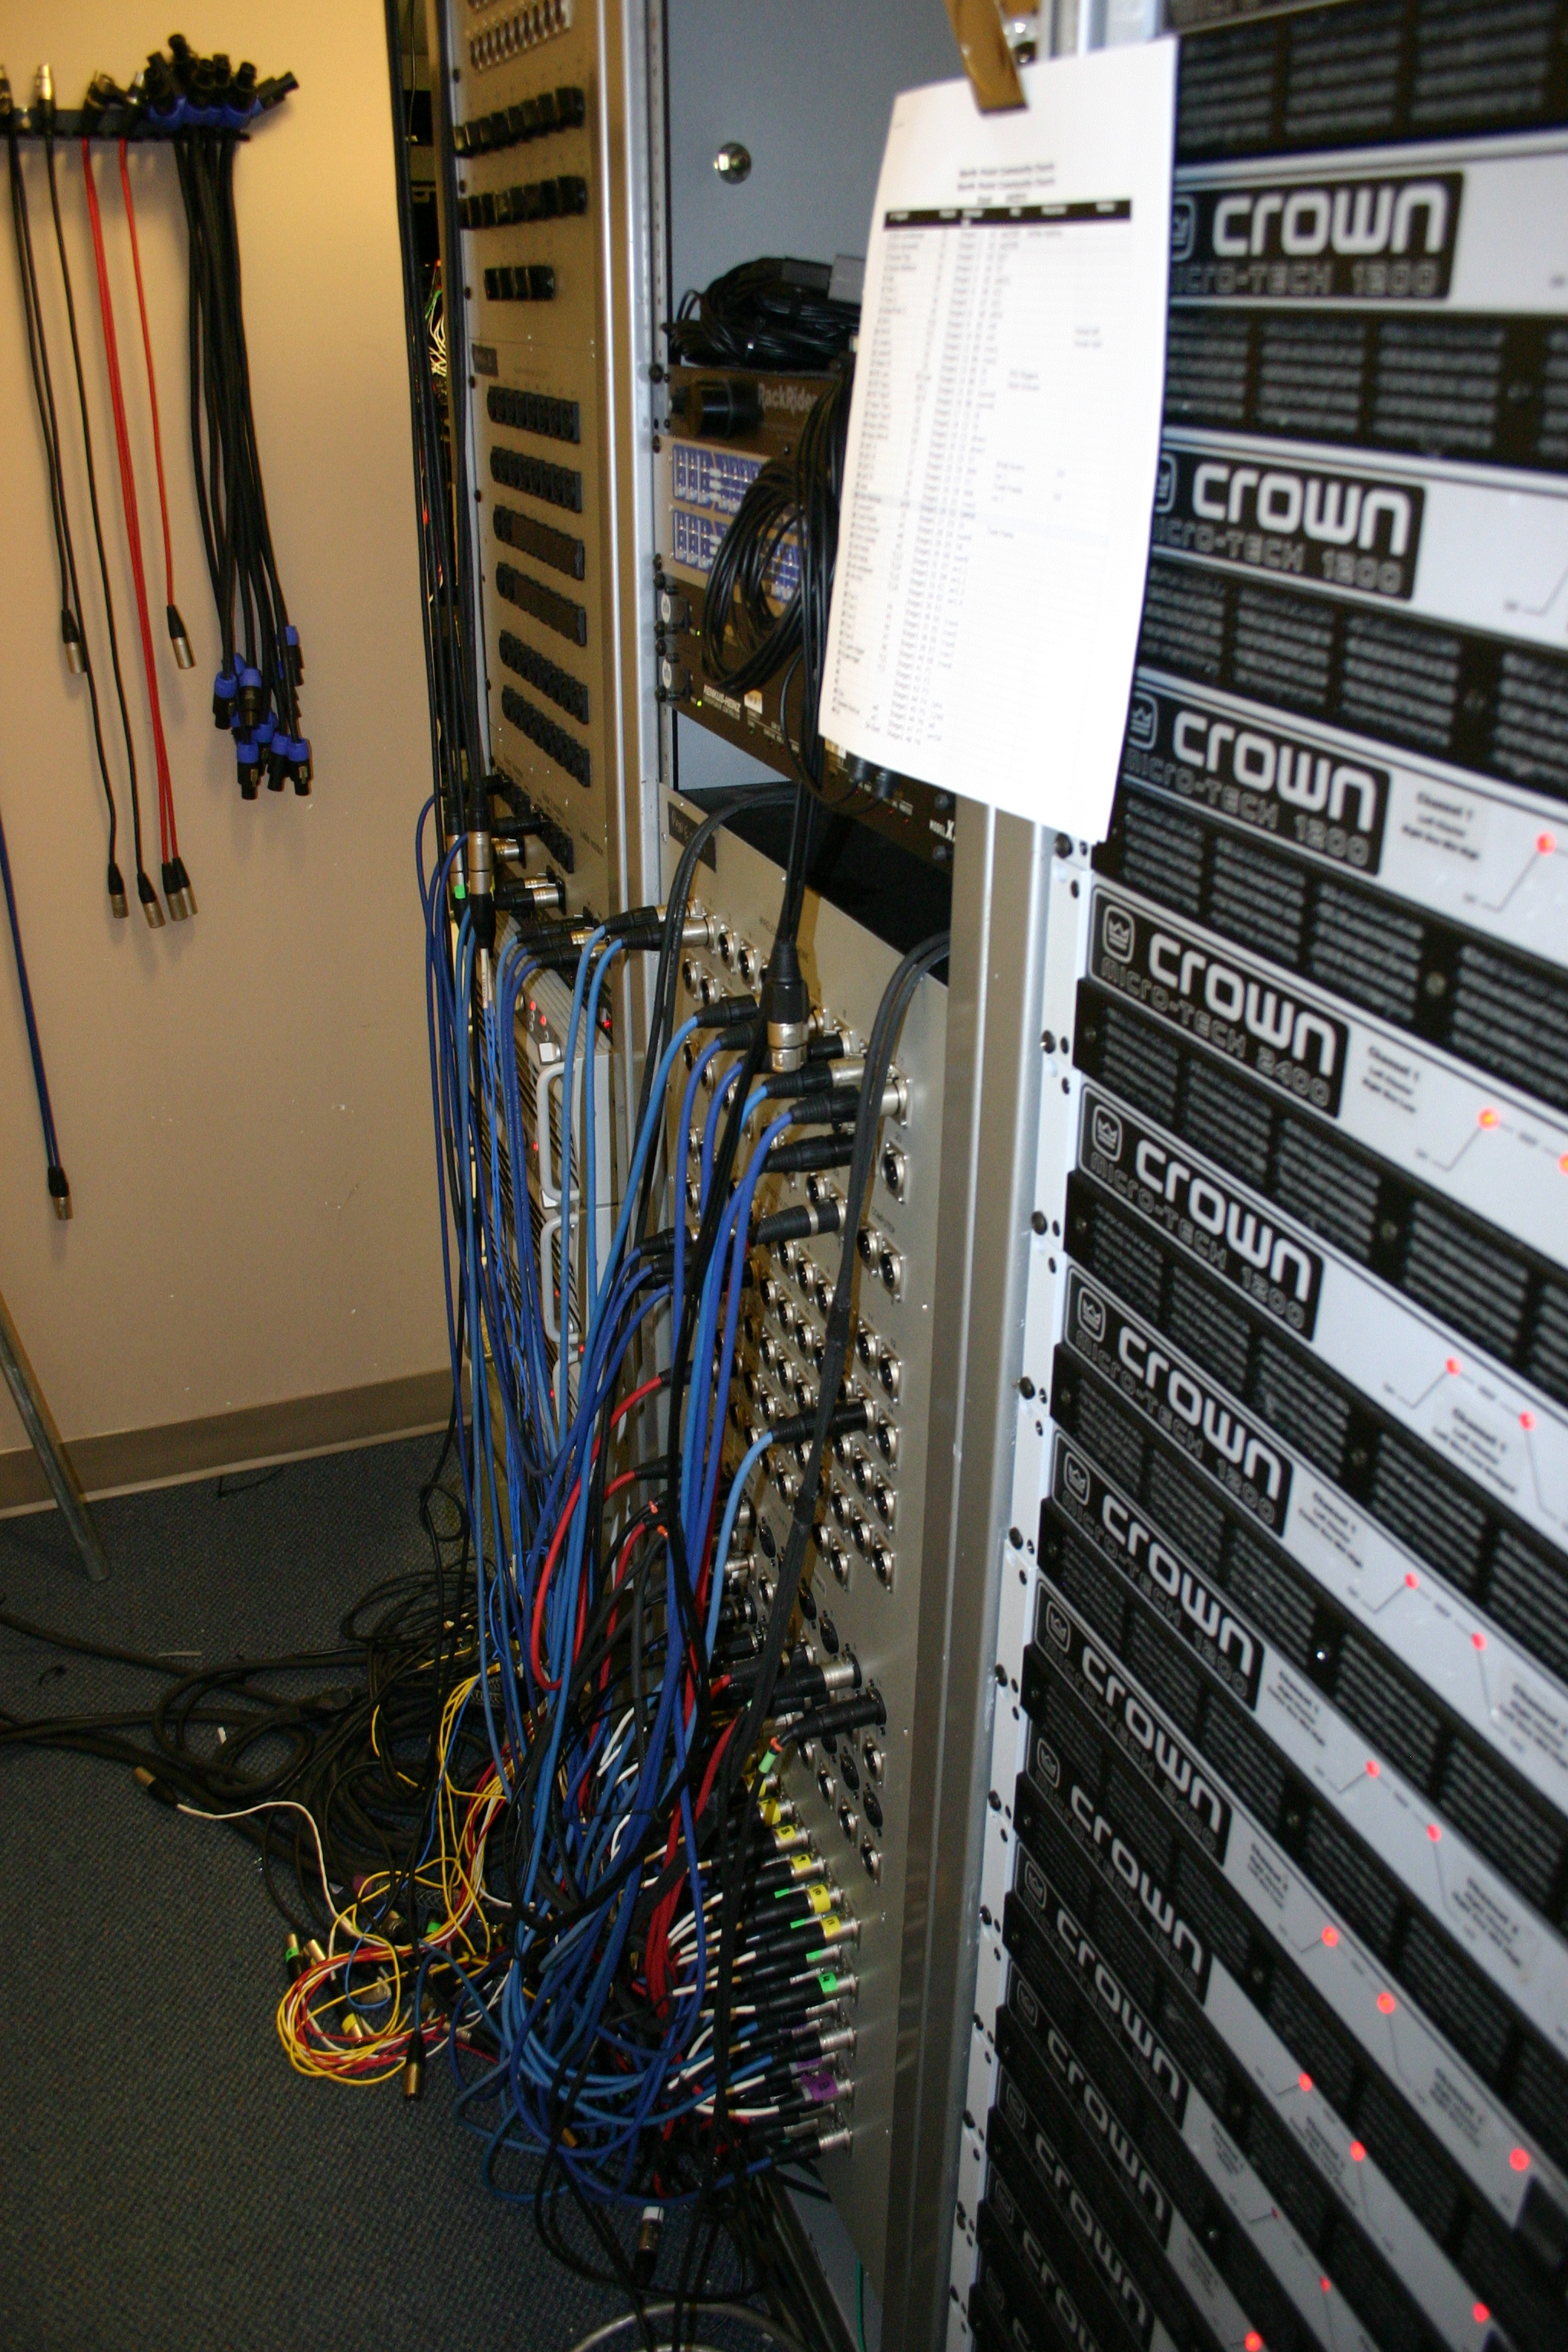
When I came on staff almost four years ago, our patching/stage infrastructure or cable harness wasn’t so much a mess as it was simply outdated and past its prime. It would be very easy for someone to look at the setup and declare it wrong, but when viewed in the context it was installed under the decisions made back then make a lot of sense. We’ve probably been operating on version 1.3 or 1.4 over the last few years, but the reality is we’ve been yearning for v2.0 for a while now. The fact that we’ve been thinking this would happen sooner than later also shows in some of the wiring behind the racks where makeshift cables were often fashioned and left in place much longer than they were ever intended.
I’m embedding a video tour of the amp room in its previous and now newer state, but here’s a little background to start with.
The driving idea as I approached refitting the system was Modularity. The nature of production is that things are always changing, and I wanted to make sure that we had a system that would meet our current and near future needs while also providing room for easy and relatively cost-effective expansion in the future. Our existing setup had several challenges for us that were turning into outright problems in week to week operation. The returns from locations like the stage, snake boxes, wireless mics, FOH Tie Lines, etc. were all part of one big monster panel housed in a large box. This might not have been a big deal, but it definitely prevented any easy or logical expansion.
The existing stage input and snake system was also cumbersome to use. Each stage input showed up in three different locations on stage. For example, Input 1 showed up in a floor pocket, on a multipin snake box on stage left, and on a multipin snake box on stage right. These three Input 1’s all literally returned to ONE Input 1 in the stage returns on the patchbay. While this allowed a certain amount of flexibility for where you want Input 1 to be on the stage, it also created confusion for staff and volunteers alike in learning the system and troubleshooting problems–where is Input 1 this week? On top of the confusion, the aging monster bay hadn’t operated at 100% for several years with various intermittent problems spread throughout the system. Attempts to repair it were also fruitless due to the complexity of the design that put each of those inputs in multiple locations. Opening the box that housed the monster panel revealed a sea of wires nobody really wanted to take a stab at fixing. We had simply reached a point where there was more potential to damage working components in any attempts to fix existing problems. After 12 years, the system had really gone almost as far as it could go.
So when I sat down to figure out the new setup, the first thing I knew was the monster panel had to go. My goal was to break it out into smaller panels that could easily be serviced or replaced. I wanted simple boxes that could easily be removed for any repairs on site or to be shipped back to the factory bench. While I knew this setup would take up a little more real estate than our existing monster panel, I believe that the modularity will pay off in dividends on the back end when things stop working one day. Plus, I knew we would be downsizing some elements of the patching system along with removing all our PA amplifiers for the new powered rig.
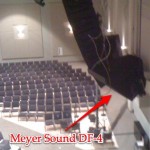
On the stage side, we made some drastic changes. We started by eliminating the majority of our floor pockets. Two were retained downstage and refitted with new panels, but the rest of our stage inputs were moved to stage boxes that enter the stage from the backstage wings. This was done for two reasons: flexibility and look. The nature of using stage boxes gives us the flexibility to put inputs anywhere we need them on our stage. Plus we have also been trending towards a completely clean stage look for some of our programming, and the new stage boxes give us the ability to clear or setup an entire stage of band gear in a short amount of time.
The boxes are configured in 12×4 and 24×4 with one of each per side. These were standard box sizes from Rapco and chosen for two reasons: to reduce costs, and to also allow for easy replacements and consistent future upgrades. The snakes connecting the boxes are also long enough to reach the opposite upstage corners of the stage so that we can put our inputs wherever they need to go on the stage. Currently we have a small box attached to our keyboard riser and a larger box attached to our drum riser. The additional boxes remain offstage acting like our previous wall panels providing additional inputs. The new setup gives us 80+ inputs on the stage which should be more than enough for the conceivable future.
Check out the video below and let me know if you have questions.
Amp Room Refit from David Stagl on Vimeo.
 Previous Post
 Next Post


Very nice retro fit! We have a similar patchbay installed by Clark ProMedia and I was wondering what you were using to hang your patch xlr cables on the wall? I’ve been looking for a good solution.
We have a couple Raxess Cable Organizers
http://www.fullcompass.com/product/303168.html