Load-In and Load-Out – Part 1
A popular subject I’ve seen come up on some forums relates to portable churches, and it seems like a lot of people are looking for some best practices on loading in and loading out. I’ve personally been doing more work with portable churches over the last couple years so I have some suggestions you can try based on my own experiences as well as hanging out with my touring friends.
Load-in and Load-out aren’t exactly the most glamorous parts of any event, but they are a big part of the territory in most of live sound. The first thing to keep in mind is very simple: everything that comes in will need to go out. This means you want be as strategic as you can because every piece of gear or furniture you move is a piece of time and energy. The less you can load-in, the faster the process can go on both ends of the day.
Now, this may seem pretty obvious to you, but I mention it because gear accumulation and hoarding is a natural part of production. When you’re portable it’s even more important to keep things as lean as possible, though. The issue doesn’t show up the same way in typical live sound scenarios, however, because most sound companies have something most portable churches don’t: a shop. Many portable churches simply load in and out for the event and don’t touch their gear again until the next time they need to use it. This makes it easy to fall into the trap of adding equipment to a growing pile so be vigilant on your equipment acquisitions. When stuff breaks, get it fixed or get rid of it right away. If you’re not using something, leave it in the trailer/truck or get it completely out of there for good.
Now, let’s talk about venues. For many of you, this is probably beyond your control, but those of you who are in the process of looking may wish to pay attention.
Stairs are the enemy. Stairs burn extra time and energy for your team, and ideally, you should avoid stairs as much as possible especially when it comes to the larger gear you’re using. Sometimes it’s hard to get away from them once you’re in the room, but that’s a far far better situation than if you have to load every piece of gear up and down stairs. It will probably not take long for you and your crew to burnout if a lot of stairs are involved.
Elevators are better than stairs, but they can still be a big time suck. Small elevators will hold a limited amount of gear so you’ll have to wait for them and potentially negotiate usage with other patrons in the building at some point in your day. Large freight elevators are better, but they are still going to suck time because it’s basically the equivalent of reloading and unloading your truck/trailer.
Flat ground is always best, in my opinion, but ramps are the next best thing. In most cases I’d probably prefer a ramp out of a truck over a lift gate, but I’ve also seen guys rock a lift gate pretty good so you’ll have to decide for yourself. When you’re scouting your venue, though, make sure any on-site ramps you’ll use that double-back or turn will have enough clearance for your cases and equipment to easily make the turn(s).
Don’t overlook doorways, either, because not all doorways are created equally. Make sure you can get your gear in and out when each door is open. This is very important because not all doors give complete access to the full width of the frame when completely open. Some doors that don’t open completely may also have handles and handle bars that narrow your entry. So make sure to measure every door and make a note of how much room you actually have to work with. Also make a note if you’ll need to add door stops to your gear collection for propping doors while loading in and out. If you do carry door stops, make sure you have about 3x as many as you have doors because I can almost guarantee these will disappear over time.
I mention all this because portable churches are often setting up in non-traditional venues that weren’t designed for a load-in. In general, you want to make things as easy on yourself as possible because you will be doing this every week, but you also want to make sure you will be putting as little wear on the facility as possible so you stay in the good graces of the folks providing you the space.
So another thing to look at are any carpets you’re going to have to go over. You want to make sure your cases aren’t going to tear them up AND you want to make sure they’re not so thick that you’ll have a hard time pushing your cases. Narrow halls and passages are another thing to watch out for when possible because they often need extra care to navigate to avoid damage, and that will add time.
Now let’s talk about organization. People who know me well, wouldn’t exactly call me a clean freak. My studio is typically pretty messy, but I know where everything is and I don’t have clients in it. When it comes to loading-in and loading-out, though, I run the opposite direction because extreme organization is time and energy management.
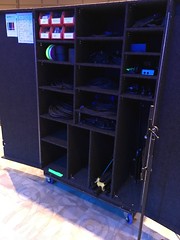
The first place to start is storage. Every case should be explicitly labeled with what it contains. If there are compartments in each case, label them with what goes in each compartment. Don’t assume someone is going to know how to repack it based on the shape of something or a pre-existing pile of stuff that didn’t exit the case. In fact, never assume anything in any of this. Remove all guesswork and label things to ridiculous ends.
When I worked with the folks at Victory Midtown last summer, they had their load-in and out down to a science. A big part of this was thanks to the labeling on all their cases. Cases were clearly labeled with what they contained, where they needed to go in the venue, and where they needed to pack in the trailer. We were in and up and running with soundcheck in less than 45 minutes and getting out at the end of the day took roughly the same amount of time.
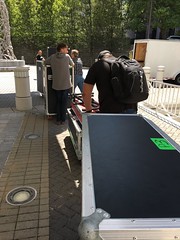
Personally, I prefer road cases for storage. They’re made for going in and out of a venue so they’re durable, and they typically have wheels. I like cases organized by discipline, and then sub-divided. For example, lighting gear should ideally be kept separate from audio gear and from video gear. In audio, you can then start splitting things out to consoles, cables, mic stands, etc.
Something else to consider with your cases is they should be easy to load and unload while still protecting the gear. Consider microphones, for example. Ideally I want to be able to grab what I need, use it for the day, and then slide it back into its spot.
This is a personal preference, but if you have smooth ground and an easy in and out, big road cases are fine. However, if you are going to have to do a lot of carrying of things I prefer smaller cases that are more light-weight. Not everyone may agree, but I would rather do more trips carrying lightweight cases than have to deal with fewer trips and big and bulky cases.
Here’s one last thing to consider as you’re subdividing cases and storage compartments within them. Sub-division helps in speeding up your process because it helps you find things, however, I believe there is also a point at which too much of this can actually start to hurt you. For example, if you have a road case that has 12 compartments, people will spend more time trying to find the specific compartment they need to put something in. So the key is finding a balance of organization based on all of your gear, and that’s going to be different for everyone. For example, you have to decide if you need a separate spot for each XLR cable length or if you can get away with keeping them all together.
Next time I’ll get into the infrastructure side of things and some ways of making the process smoother.


 Previous Post


I go for bigger cases with everything on wheels, we have a tail lift on the van which helps, the large cases have lift out sections with cables then space for stands and cable reels under